Getting Started
Sign up and create your profile
To start using Devmaniac, create an account first. After signing up, Devmaniac will guide you through onboarding so you can set up your public developer profile.
Your profile is your developer identity on Devmaniac. It gives context to your live projects, finished projects, coding progress, skills, and links.
Step 1: Sign up for Devmaniac
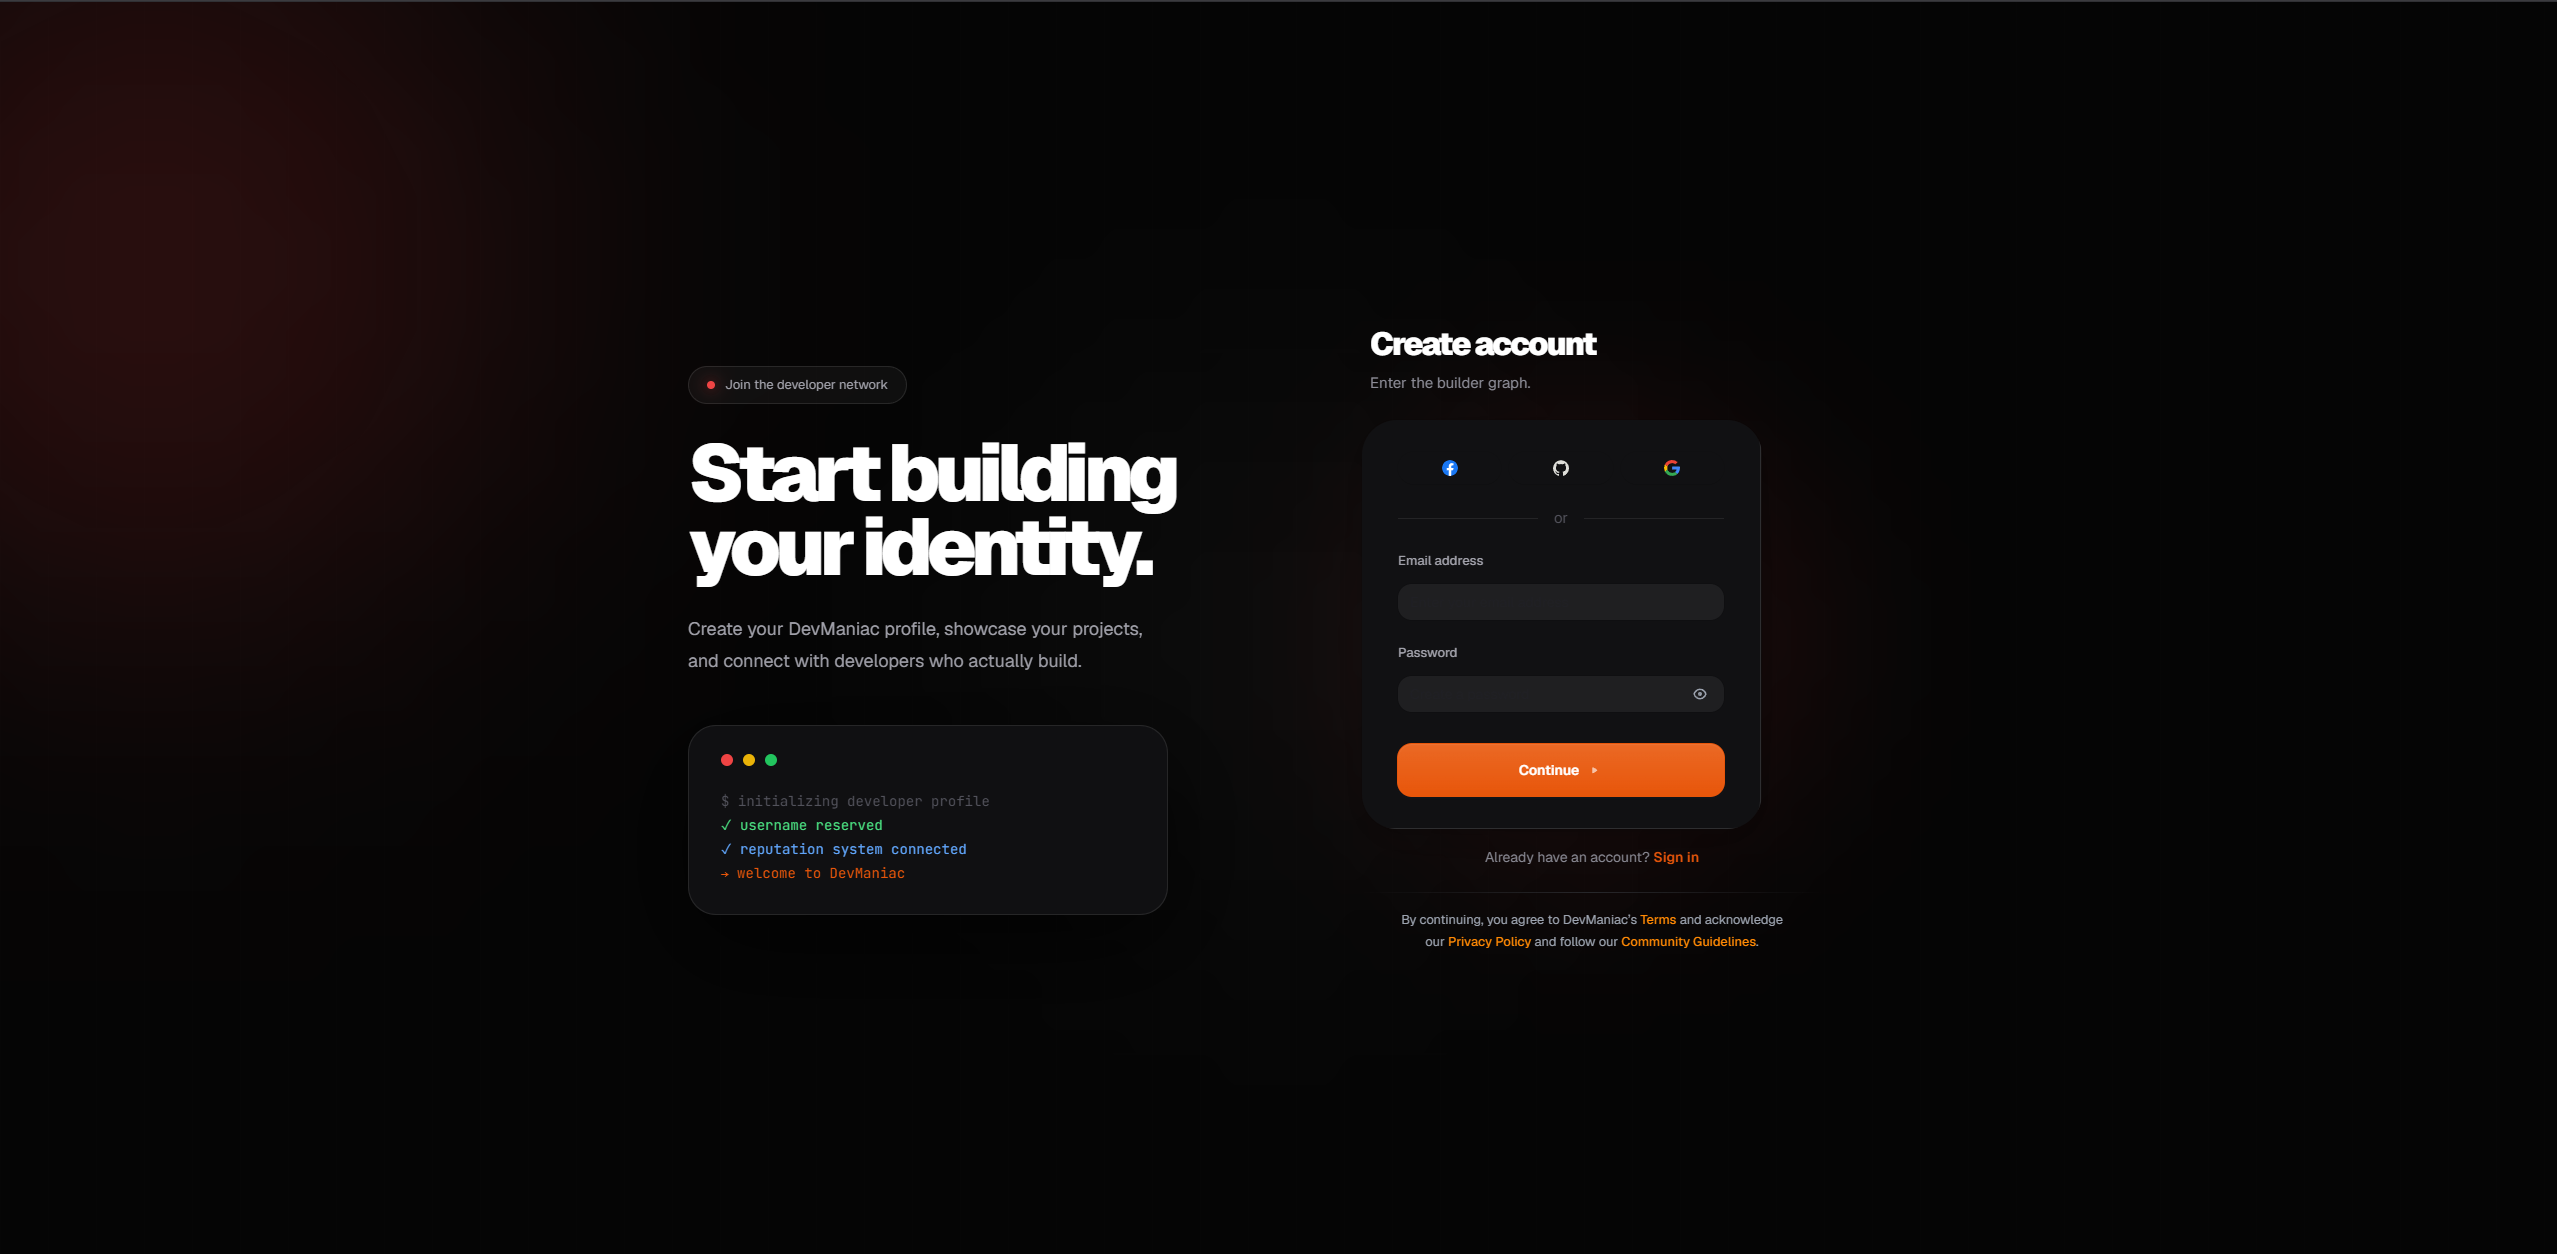
Go to Devmaniac and click the Get Started button. This will take you to the sign-up page.
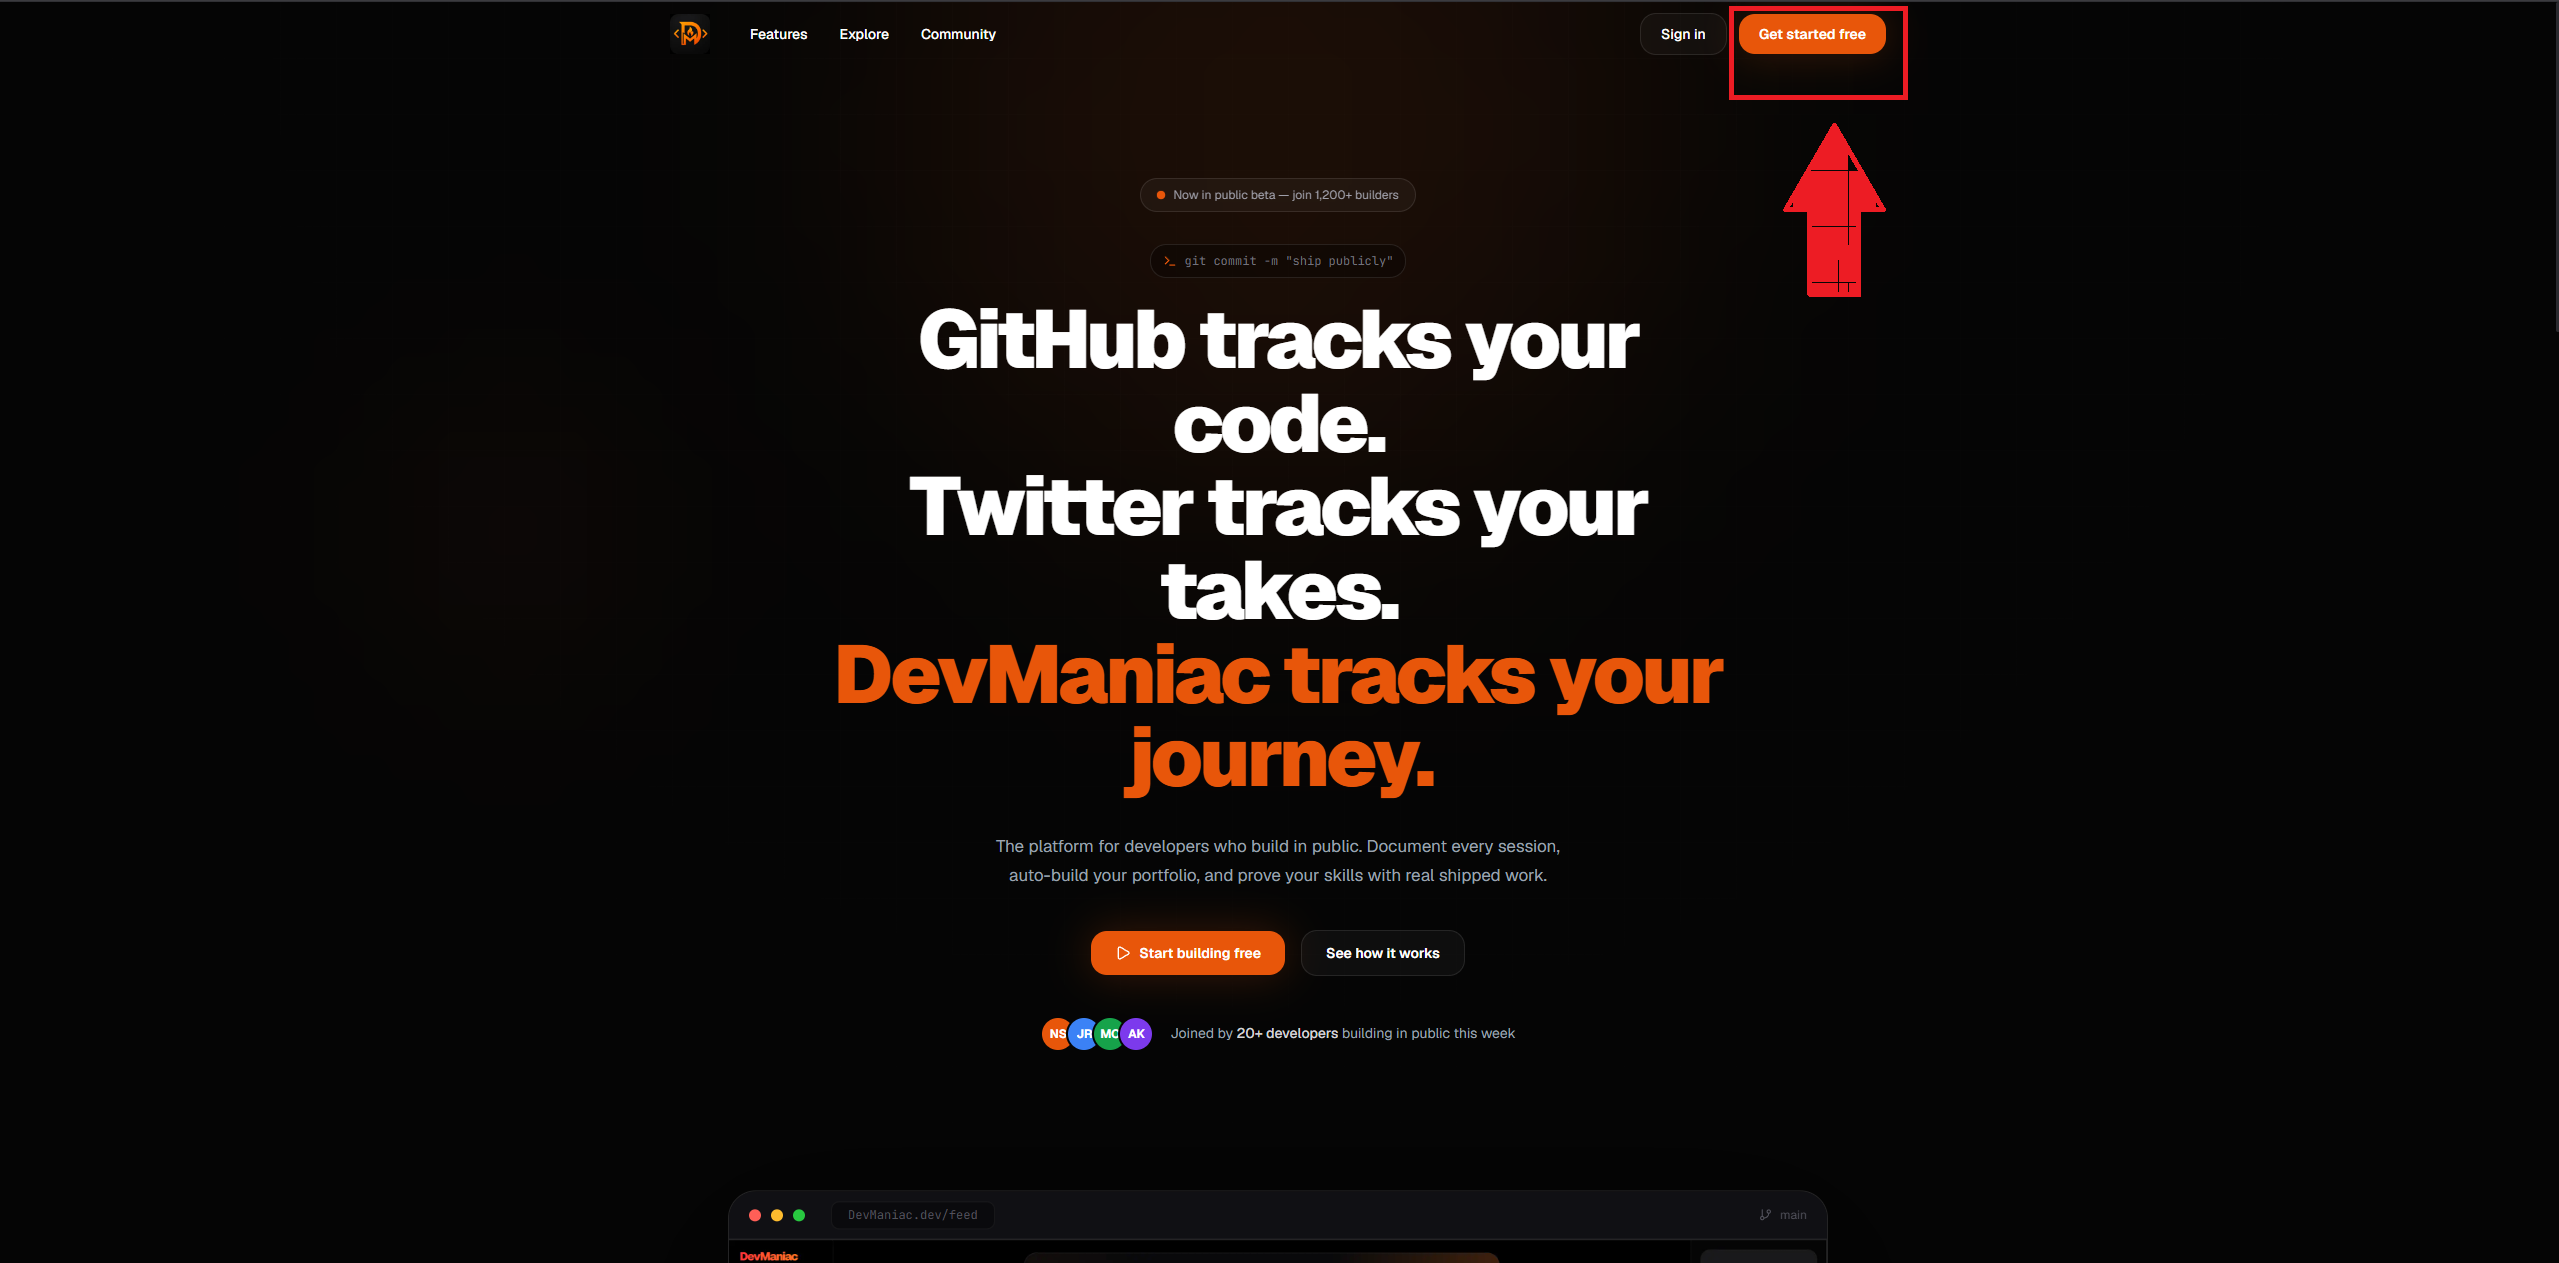
Choose your preferred sign-up method. After creating your account, you will be redirected into the onboarding flow.
Step 2: Complete onboarding
Onboarding is where you set up the basic information for your profile. Keep it simple. You can always improve your profile later.
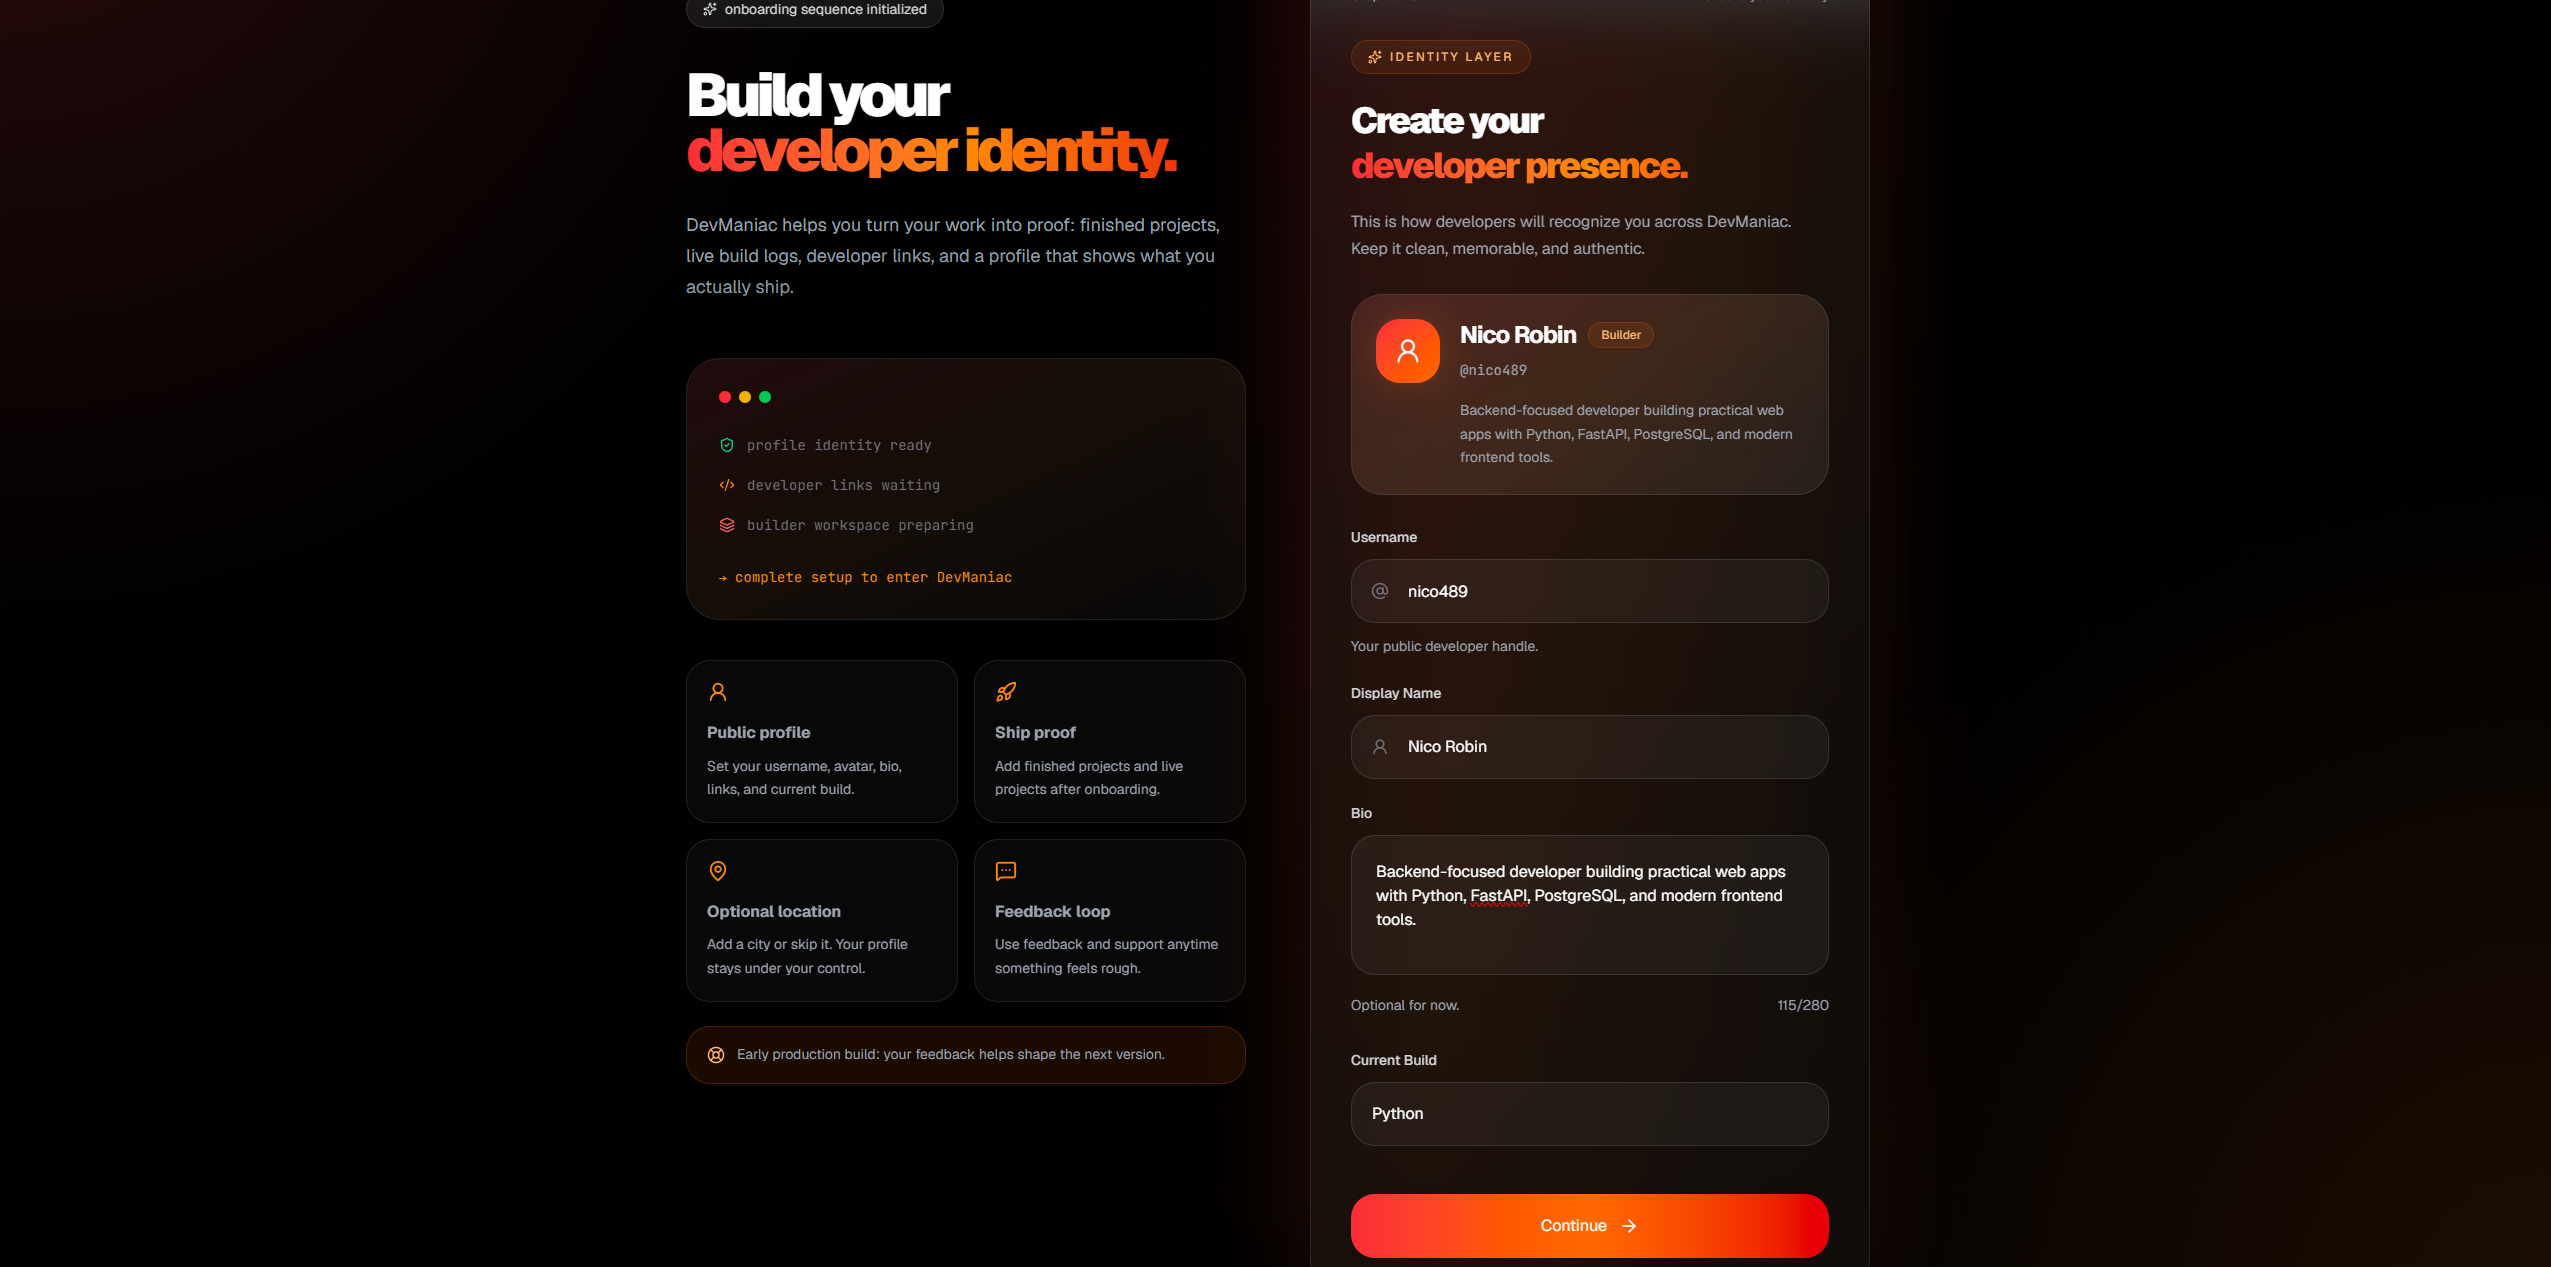
Onboarding step 1: Add your basic information
Add your name, username, bio, and current build. This helps visitors quickly understand who you are and what you are working on.
Onboarding step 2: Add profile and cover images
Add a profile image and cover photo. You can upload images from your device or use an image link.

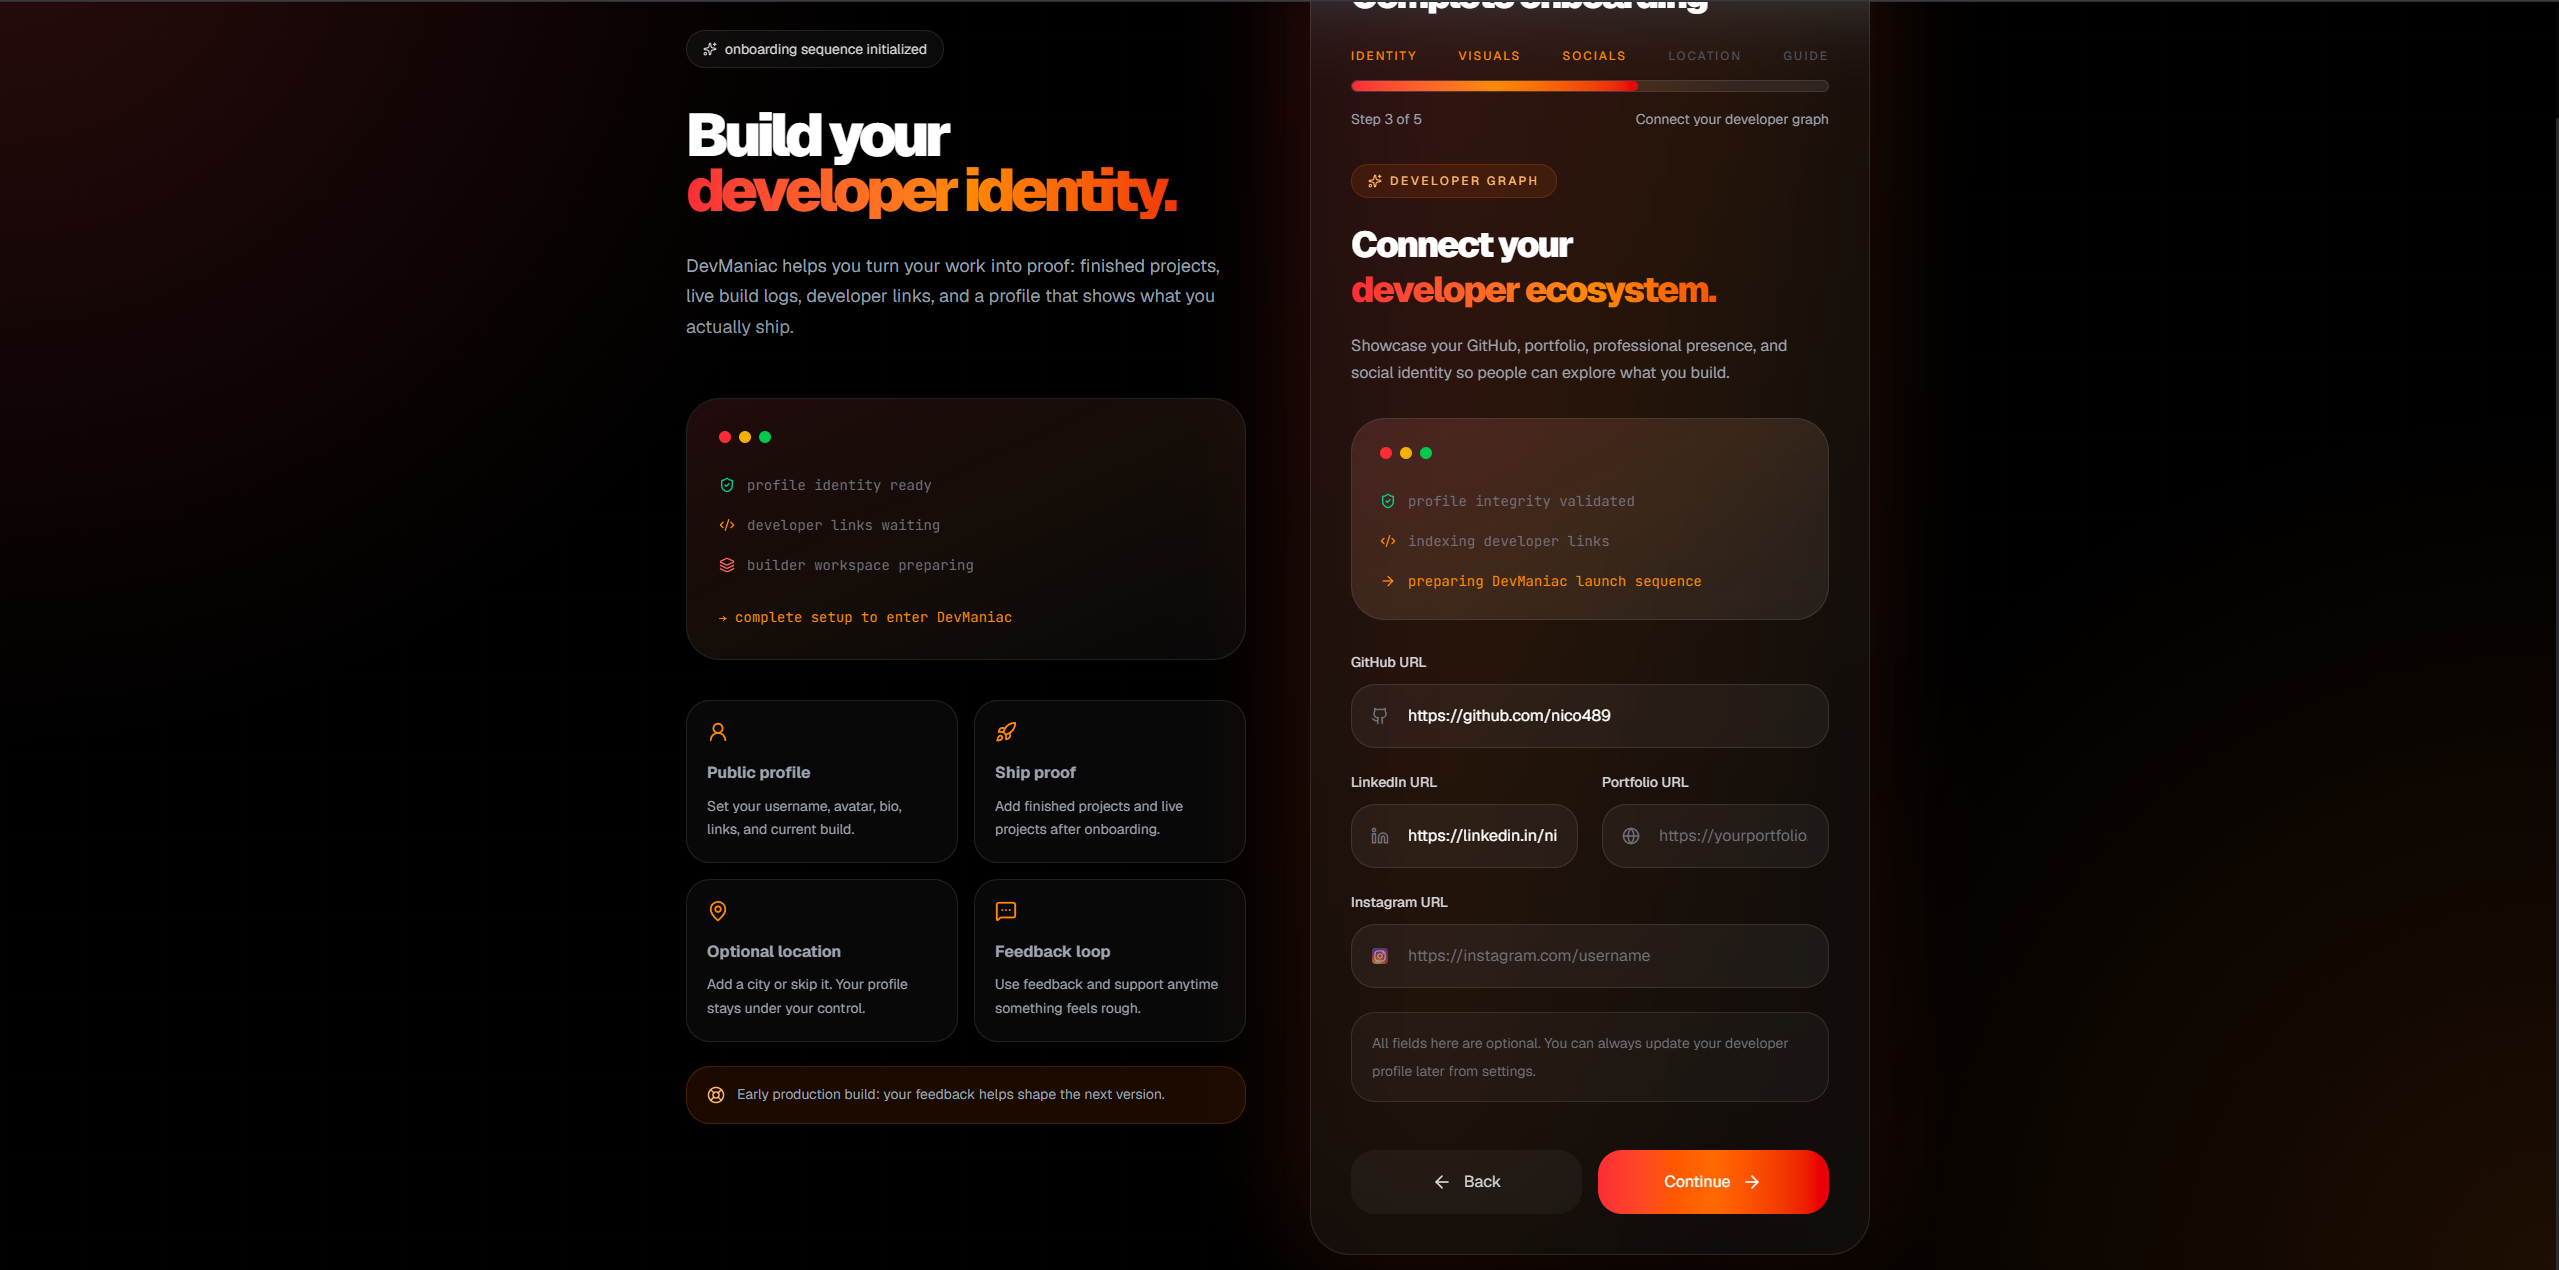
Onboarding step 3: Add your social links
Add links to your developer identity, such as GitHub, LinkedIn, portfolio, Instagram, or other public profiles. Adding GitHub is strongly recommended because it helps people verify your work.
Onboarding step 4: Add your location
Location is optional, but useful. It can help local developers, students, hackathon builders, and startup communities understand your context.
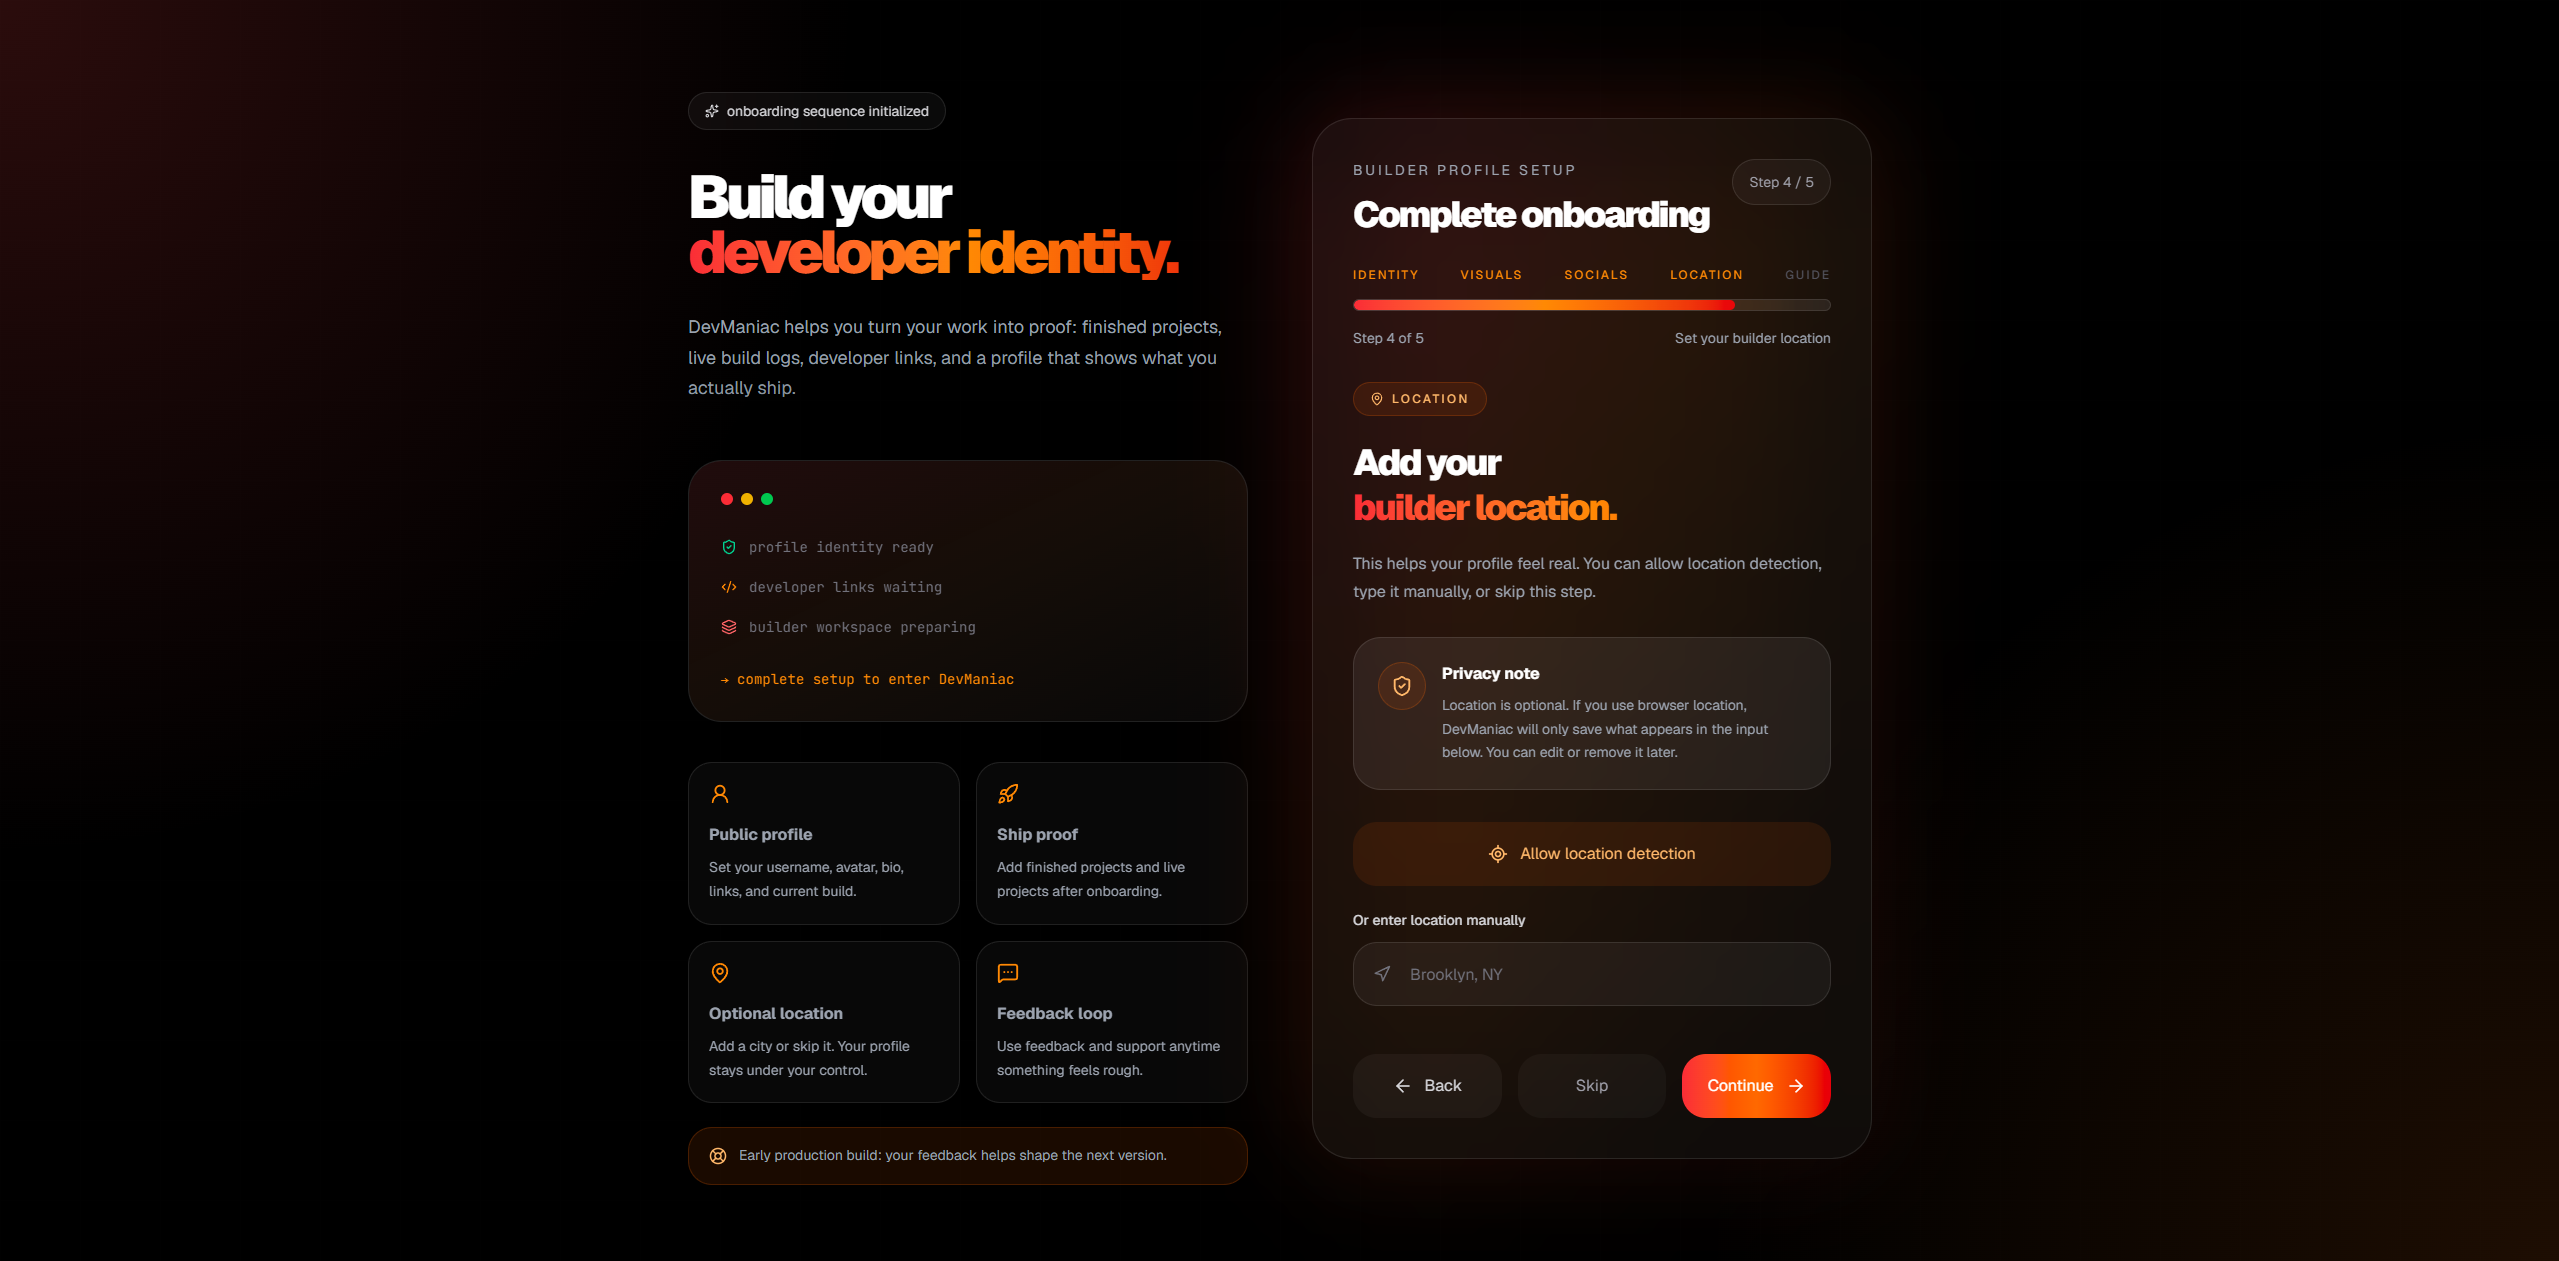
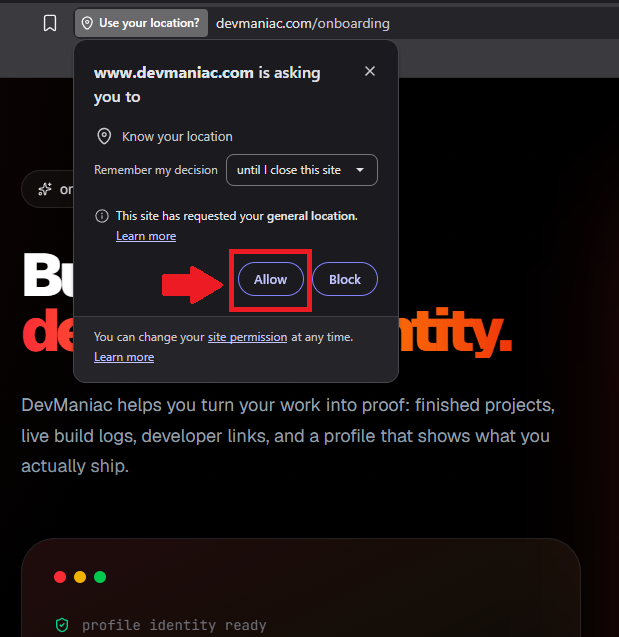
You can write your location manually, such as Brooklyn, NY, or allow the browser to fetch your location.
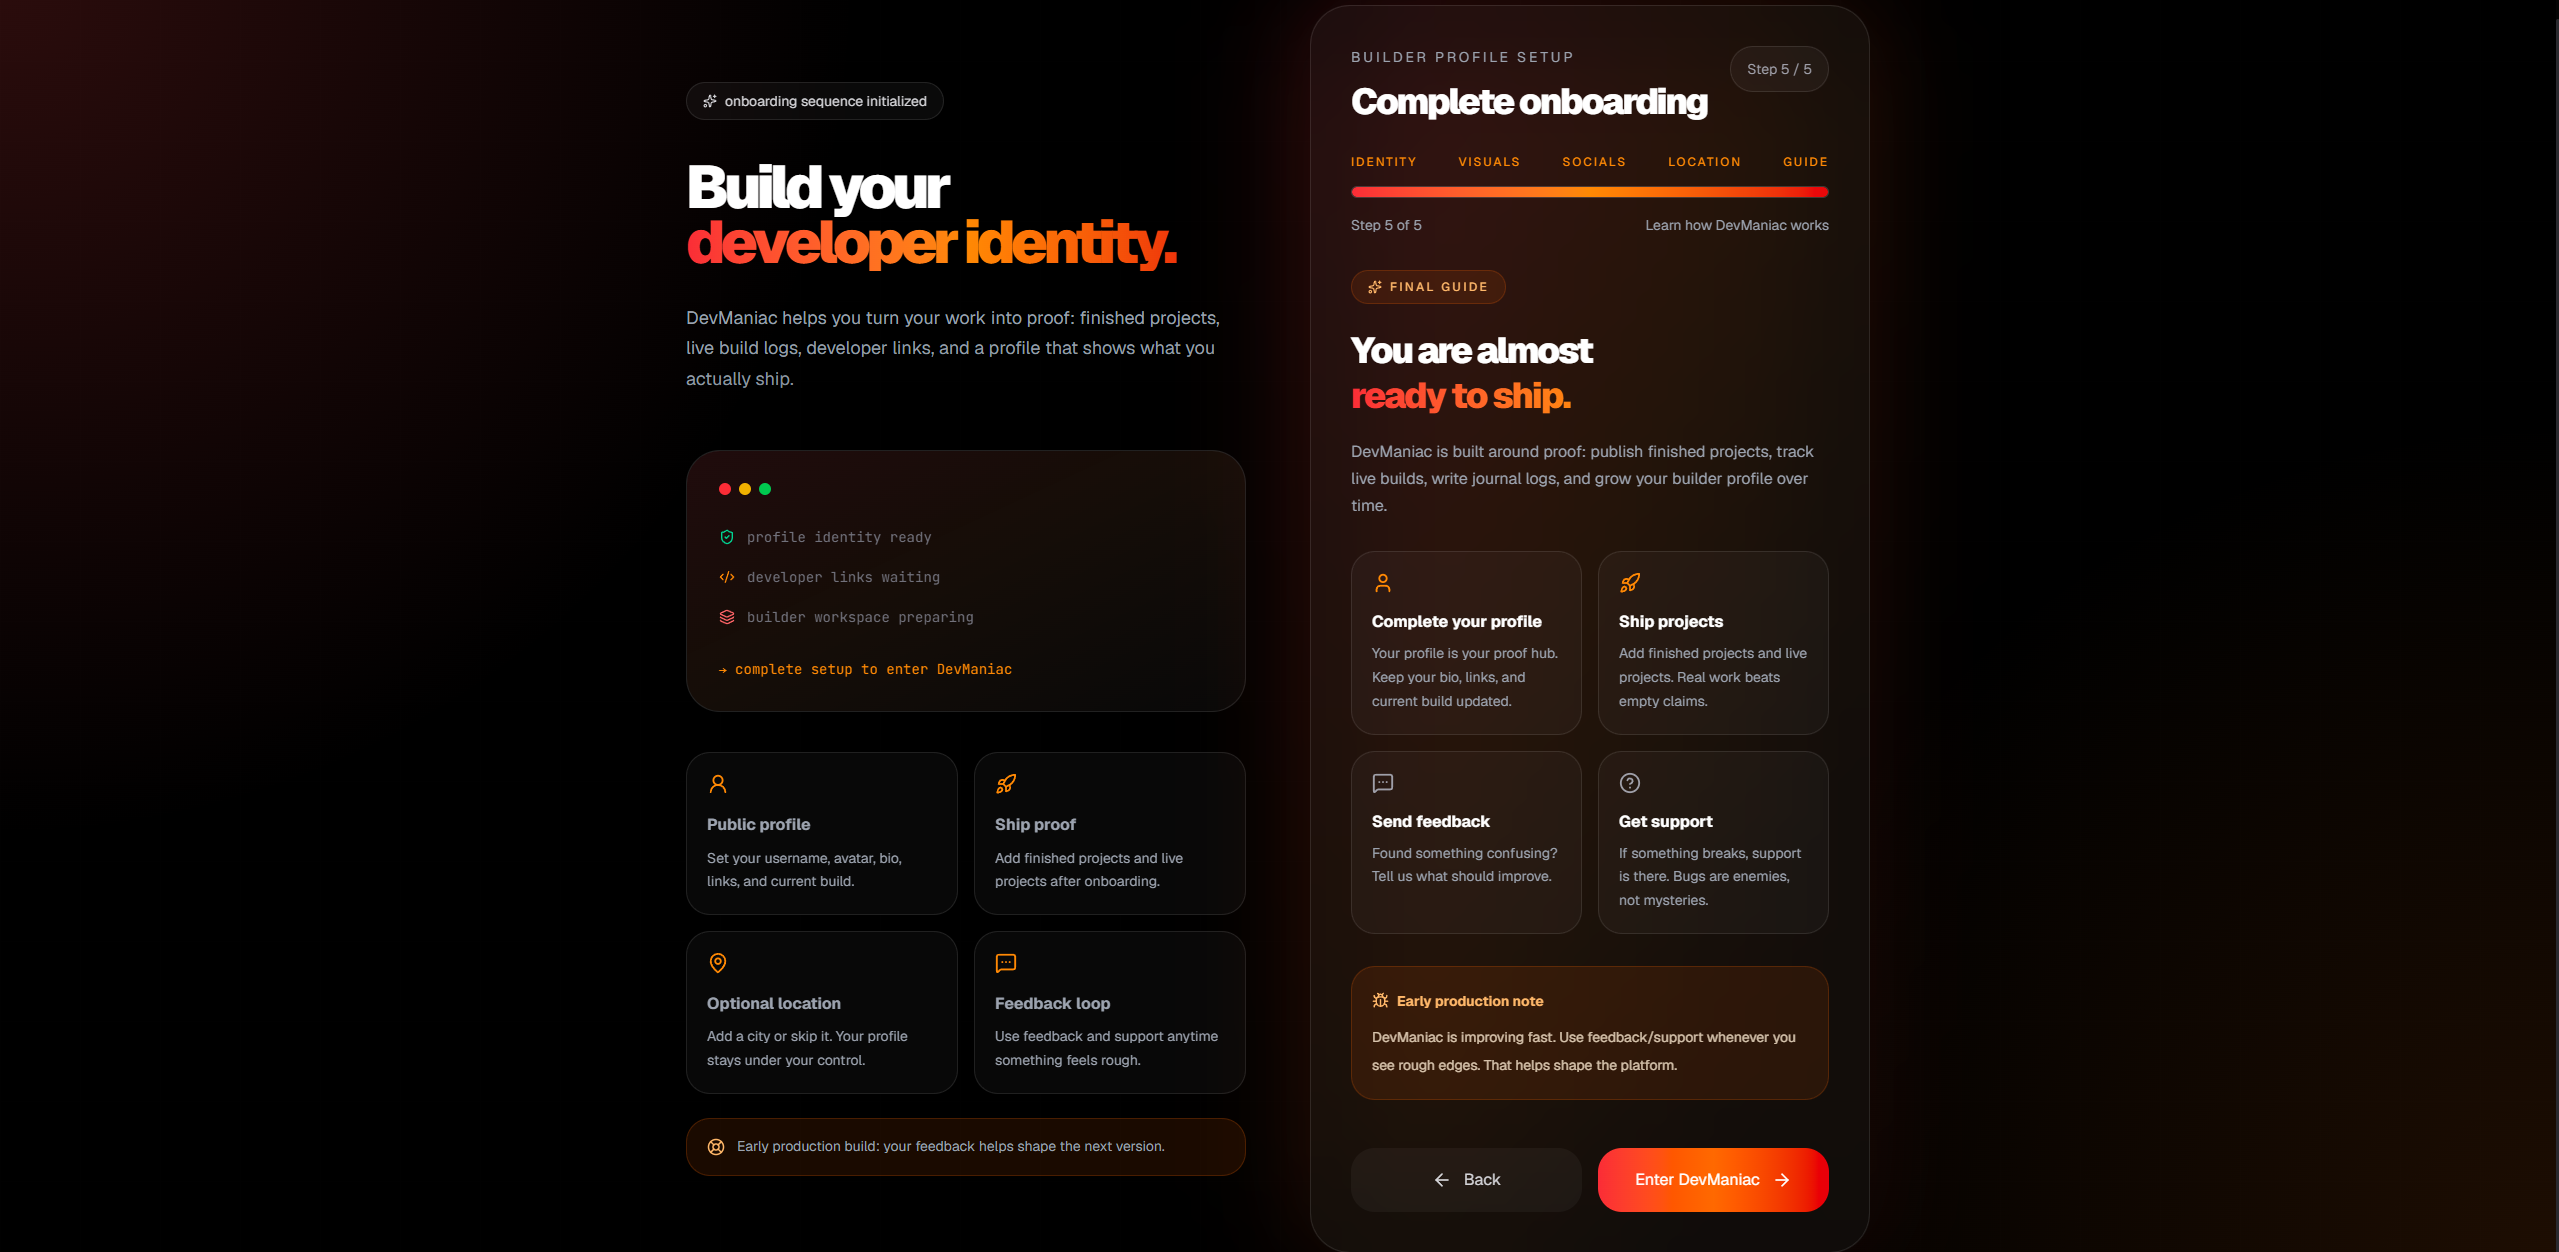
Onboarding step 5: Finish onboarding
After completing the onboarding steps, you will see quick guide links. These help you understand what to do next inside Devmaniac.
Step 3: Review your public profile
After onboarding, visit your public profile. This is where your identity, projects, progress, and links come together.
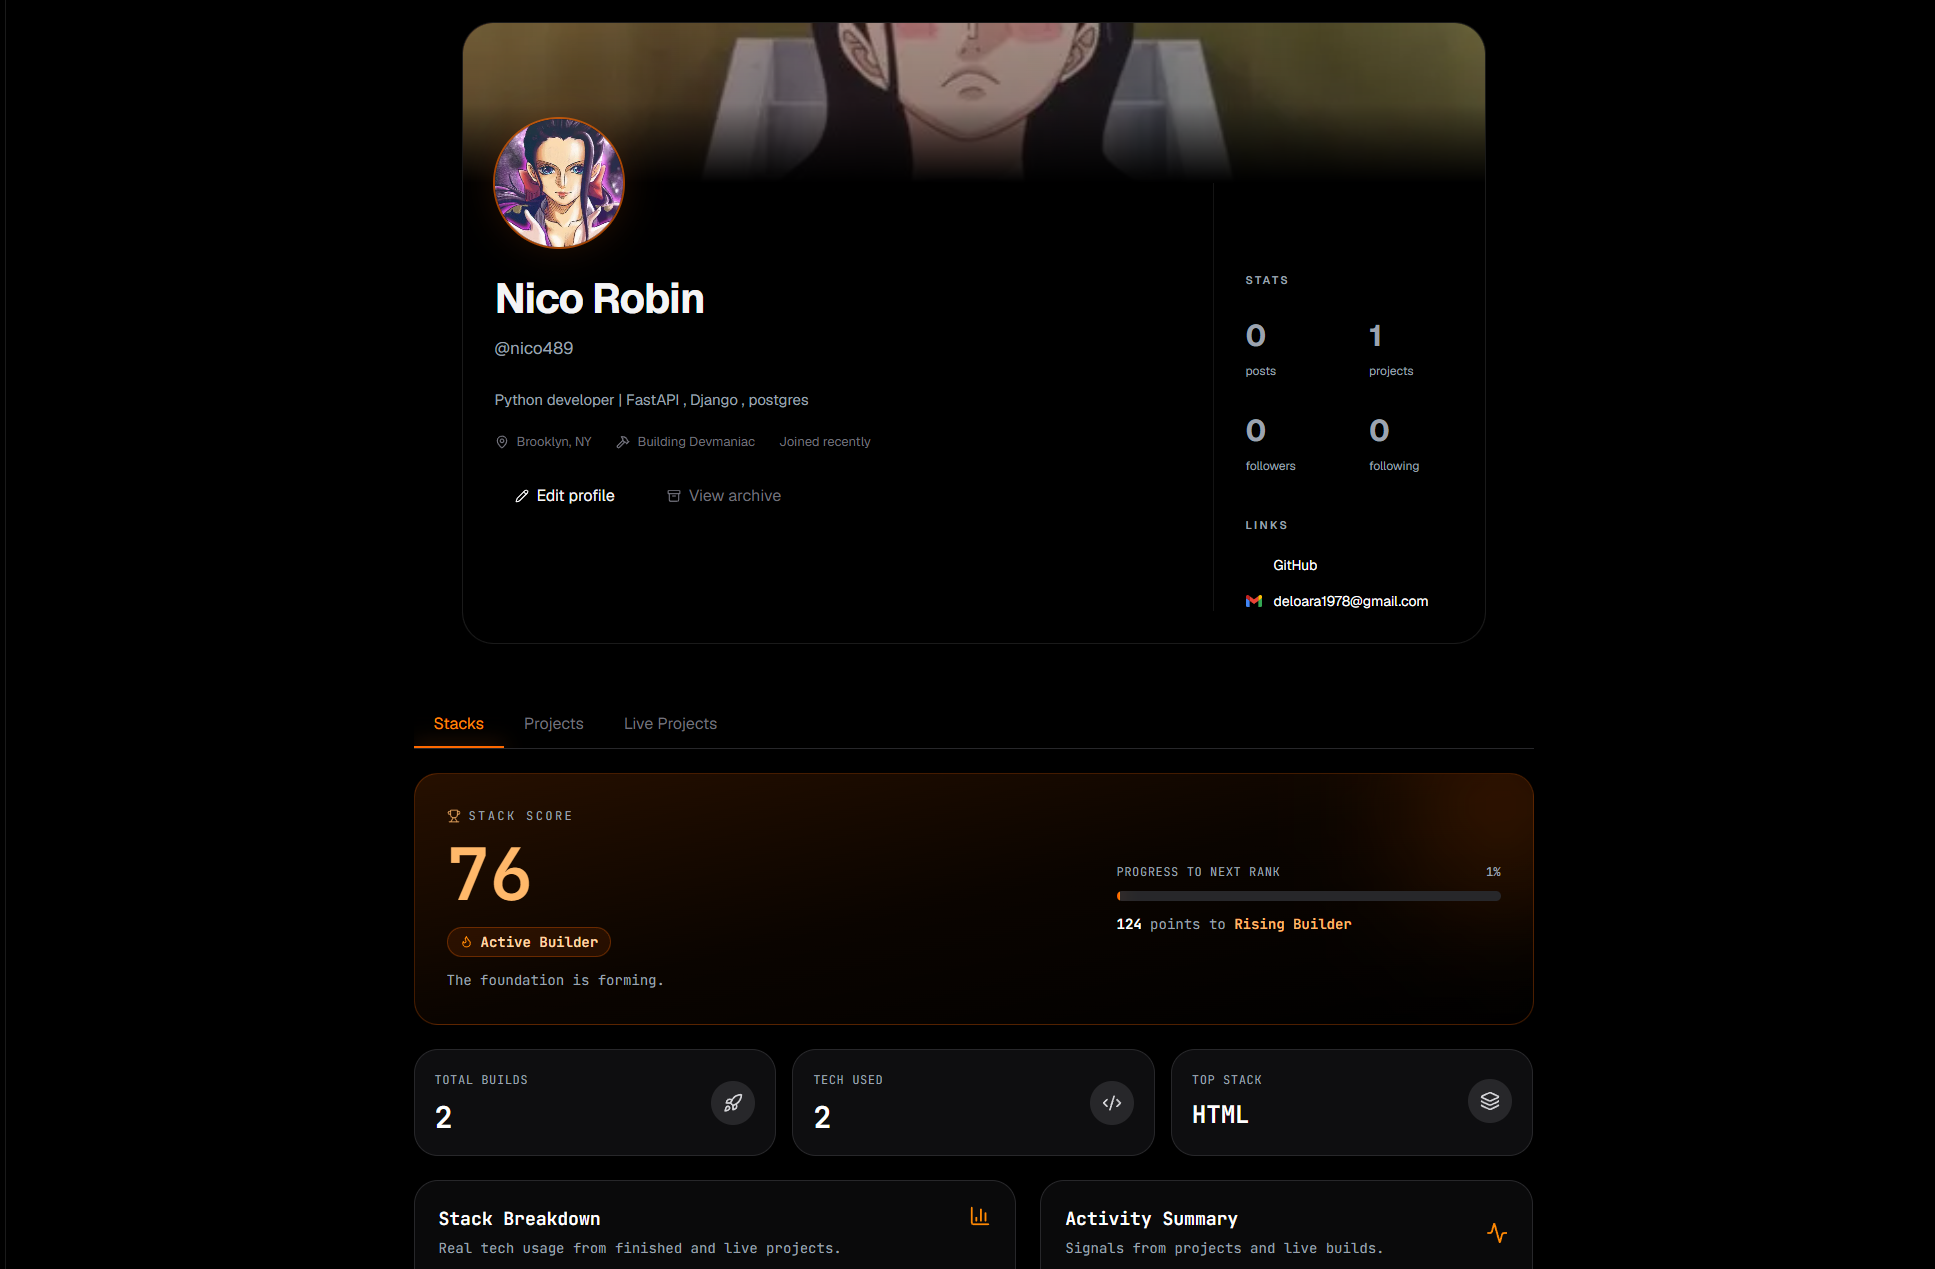
Your profile does not need to look perfect on day one. It should simply make your work easy to understand.
When someone lands on your profile, they should quickly understand who you are, what you are building, and what kind of developer you are becoming.
Common issue: user sync failed
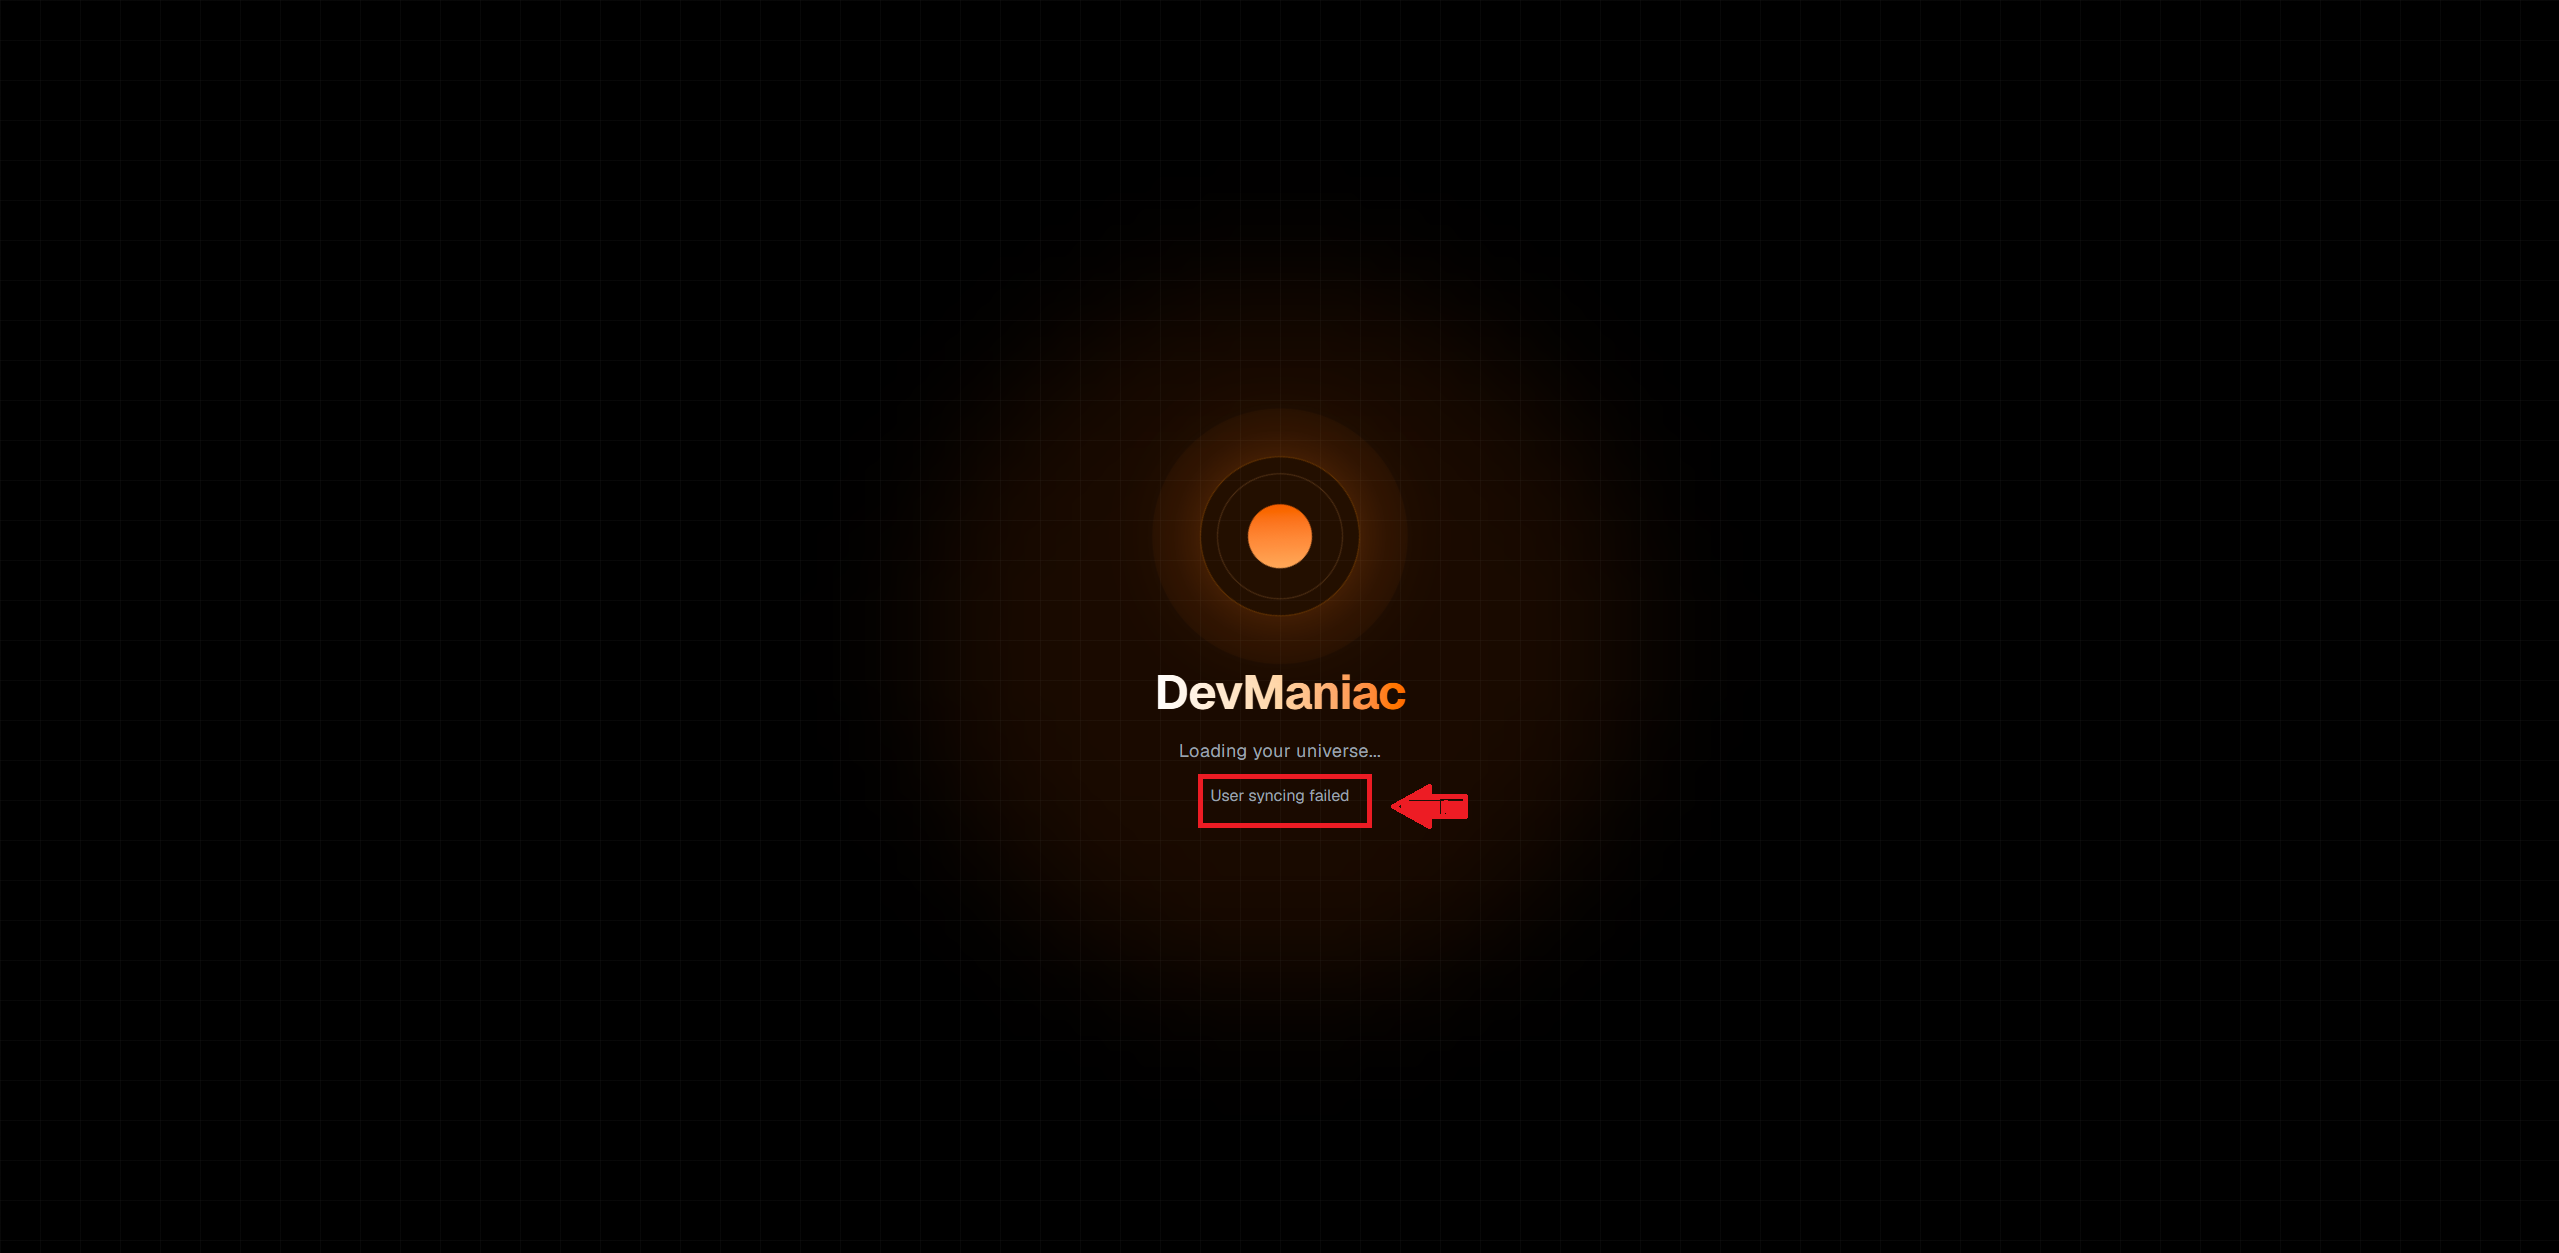
If you see a User syncing failed message during onboarding, refresh the page once. In most cases, the account sync will complete after the refresh and you can continue normally.
If the message still appears after refreshing, sign out, sign in again, and try
continuing onboarding from your profile page.
If still issue persist try restarting your browser and device or contact : devmaniacsupport@gmail.com
What makes a good Devmaniac profile?
A strong profile is clear, honest, and connected to real work. It should not depend only on a list of technologies.
A good profile usually includes:
- A clear username
- A recognizable display name
- A focused bio
- A current build
- A profile image or avatar
- Useful social links
- At least one live project
- Project journals or updates over time
Write a useful bio
Your bio should explain what kind of developer you are and what you are currently focused on. Keep it specific.
Full-stack developer learning FastAPI, Next.js, PostgreSQL, and AI-powered web apps. Currently building live projects and documenting progress.
You do not need a fancy bio. You need a clear one.
Use your projects to prove your skills
Saying you know React, FastAPI, PostgreSQL, Redis, or Docker is useful, but the stronger proof comes from projects where those tools are actually used.
Devmaniac is designed so your profile grows through project activity. The more you build and document, the more your profile becomes proof of work.
Common profile mistakes
Avoid these mistakes:
- Leaving the bio empty
- Using a random username that is hard to remember
- Adding broken or unrelated links
- Listing too many technologies without project proof
- Creating a profile but never adding a live project
- Trying to look perfect instead of showing real progress
The goal
Your profile should answer one simple question:
What is this developer building, learning, and proving through real work?
Start simple. Sign up, complete onboarding, review your profile, then add your first live project.